This blog is similar to my Planet Armor vBench, which can be found here. http://planetarmor.com/forums/showthread.php?t=6781

In the box are two sprues of dark grey plastic, one each for the kitchen and the limber and two sprues of white plastic for the horses and figure. Also included is a rectangle of flexible plastic to make the harnesses.
I gathered as many reference photos as I could find on the Internet to check the accuracy of this kit. Although the kit dates from the late 1970's it is a very accurate representation of a German World War 2 field kitchen & with a few additions it will build into a very realistic model. From the reference photos I found, it is obvious that there were several different types & sizes of field kitchen. Looking at the walk around photos of the field kitchen that Jamie Tainton posted here on Armour Workshop (Thanks James) it appears to be almost identical to the kit. Although the kitchen and as far as I can tell the limber is very accurate, the figure is not so good and the upper body appears to be quite small. Hopefully, when painted and seated on the limber it will look ok.
Construction:
Construction starts with the chassis of the kitchen. The parts here, particularly the leaf springs and axle required quite a bit of cleaning up due to the moulds being misaligned.

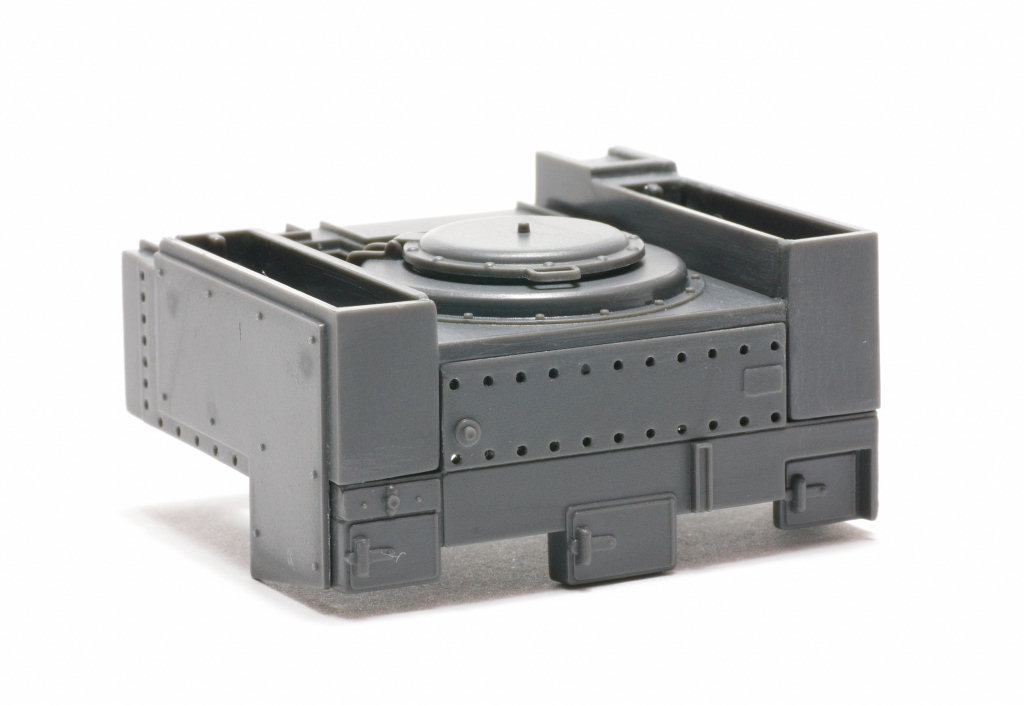
Moving on to the body of the kitchen the parts fit together very well due to various locating pins. I drilled out the holes on the panel on the rear of the kitchen.

Dry test fit of parts. The gap at the front of the kitchen is not as large when glued, but it will need a little filling.

The wheels took a long time to clean up as there is a mould seam on both sides of each spoke and on the inside of the wheel rim.

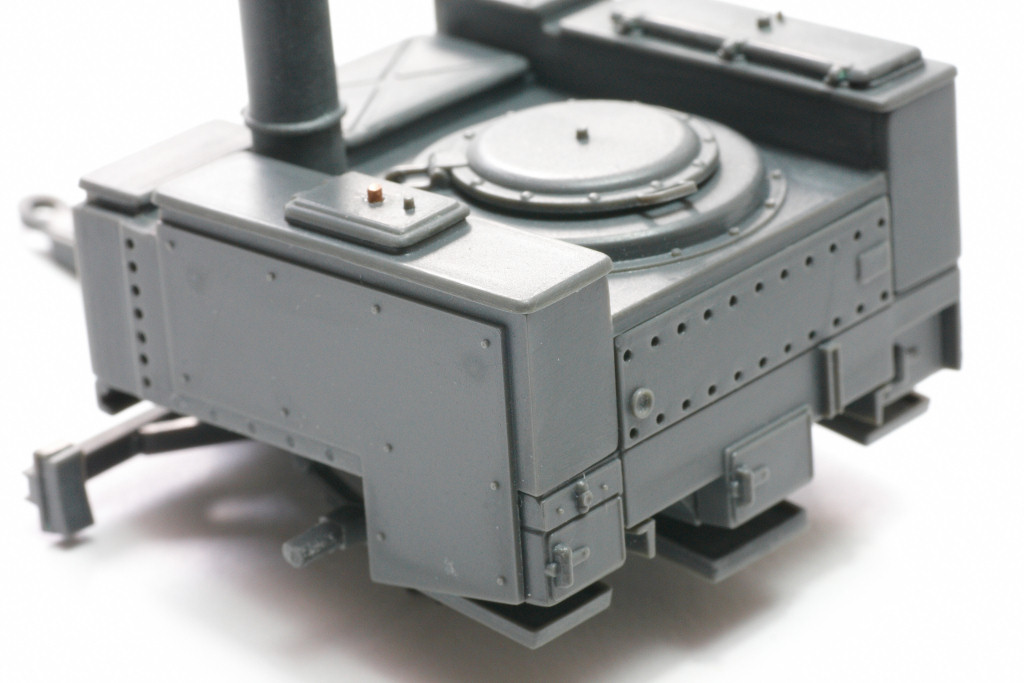
Chimney & ashtrays added. The field kitchen is now stuck together and all the gaps have been filled with superglue and rubbed down.

Referring to the reference photos I have gathered, I drilled out the reflector, gently bent the cooking pot lid handle upwards and used a piece of brass wire to fill the hole in the lid on the left hand side.

I tried to make the lump of plastic that was supposed to represent a handle on the small door at the front of kitchen, look like a handle by drilling it out. I only succeeded in breaking it off

I used a piece of scrap brass, from an etched set, formed using my hold & fold "bug" to make a new handle.

I filled in the row of holes on the left hand side, at the bottom edge of the kitchen, as I cannot see these holes in the reference photos. The vertical holes inline with the chimney are clearly shown in many photos but I can find no evidence of the other holes.

The kitchen is now ready for priming. Hopefully I won't have to do any more sanding.
Next time: Construction of the limber.
Thanks for looking. Comments welcome.
Tim

 Thanks for dropping in. I've got a couple of this kit so it'll be interesting to see how you go with it, maybe it'll help me in my future builds.
 Ill be interested to see how the horses turn out. Considering that the Germans had a considerable part of their military still involved with horses, I think its an area of modeling thats often under-represented in scenes. As an aside, Zvezda just released a figure kit of Russian tank hunters with dogs...its interestingly macabre enough that I might have to pick it up just for the weird factor.


