[phpBB Debug] PHP Notice: in file /includes/bbcode.php on line 483: preg_replace(): The /e modifier is no longer supported, use preg_replace_callback instead
[phpBB Debug] PHP Notice: in file /includes/bbcode.php on line 483: preg_replace(): The /e modifier is no longer supported, use preg_replace_callback instead
[phpBB Debug] PHP Notice: in file /includes/bbcode.php on line 483: preg_replace(): The /e modifier is no longer supported, use preg_replace_callback instead
[phpBB Debug] PHP Notice: in file /includes/bbcode.php on line 483: preg_replace(): The /e modifier is no longer supported, use preg_replace_callback instead
[phpBB Debug] PHP Notice: in file /includes/bbcode.php on line 483: preg_replace(): The /e modifier is no longer supported, use preg_replace_callback instead
[phpBB Debug] PHP Notice: in file /includes/bbcode.php on line 483: preg_replace(): The /e modifier is no longer supported, use preg_replace_callback instead
[phpBB Debug] PHP Notice: in file /includes/bbcode.php on line 483: preg_replace(): The /e modifier is no longer supported, use preg_replace_callback instead
[phpBB Debug] PHP Notice: in file /includes/bbcode.php on line 483: preg_replace(): The /e modifier is no longer supported, use preg_replace_callback instead
[phpBB Debug] PHP Notice: in file /includes/bbcode.php on line 483: preg_replace(): The /e modifier is no longer supported, use preg_replace_callback instead
[phpBB Debug] PHP Notice: in file /includes/bbcode.php on line 483: preg_replace(): The /e modifier is no longer supported, use preg_replace_callback instead
[phpBB Debug] PHP Notice: in file /includes/bbcode.php on line 483: preg_replace(): The /e modifier is no longer supported, use preg_replace_callback instead
[phpBB Debug] PHP Notice: in file /includes/bbcode.php on line 483: preg_replace(): The /e modifier is no longer supported, use preg_replace_callback instead
[phpBB Debug] PHP Notice: in file /includes/bbcode.php on line 483: preg_replace(): The /e modifier is no longer supported, use preg_replace_callback instead
[phpBB Debug] PHP Notice: in file /includes/bbcode.php on line 483: preg_replace(): The /e modifier is no longer supported, use preg_replace_callback instead
[phpBB Debug] PHP Notice: in file /includes/bbcode.php on line 483: preg_replace(): The /e modifier is no longer supported, use preg_replace_callback instead
[phpBB Debug] PHP Notice: in file /includes/bbcode.php on line 483: preg_replace(): The /e modifier is no longer supported, use preg_replace_callback instead
[phpBB Debug] PHP Notice: in file /includes/bbcode.php on line 483: preg_replace(): The /e modifier is no longer supported, use preg_replace_callback instead
[phpBB Debug] PHP Notice: in file /includes/bbcode.php on line 483: preg_replace(): The /e modifier is no longer supported, use preg_replace_callback instead
[phpBB Debug] PHP Notice: in file /includes/bbcode.php on line 483: preg_replace(): The /e modifier is no longer supported, use preg_replace_callback instead
[phpBB Debug] PHP Notice: in file /includes/bbcode.php on line 483: preg_replace(): The /e modifier is no longer supported, use preg_replace_callback instead
[phpBB Debug] PHP Notice: in file /includes/bbcode.php on line 483: preg_replace(): The /e modifier is no longer supported, use preg_replace_callback instead
[phpBB Debug] PHP Notice: in file /includes/bbcode.php on line 483: preg_replace(): The /e modifier is no longer supported, use preg_replace_callback instead
[phpBB Debug] PHP Notice: in file /includes/bbcode.php on line 483: preg_replace(): The /e modifier is no longer supported, use preg_replace_callback instead
[phpBB Debug] PHP Notice: in file /includes/bbcode.php on line 483: preg_replace(): The /e modifier is no longer supported, use preg_replace_callback instead
[phpBB Debug] PHP Notice: in file /includes/bbcode.php on line 483: preg_replace(): The /e modifier is no longer supported, use preg_replace_callback instead
[phpBB Debug] PHP Notice: in file /includes/bbcode.php on line 483: preg_replace(): The /e modifier is no longer supported, use preg_replace_callback instead
[phpBB Debug] PHP Notice: in file /includes/bbcode.php on line 112: preg_replace(): The /e modifier is no longer supported, use preg_replace_callback instead
[phpBB Debug] PHP Notice: in file /includes/bbcode.php on line 112: preg_replace(): The /e modifier is no longer supported, use preg_replace_callback instead
[phpBB Debug] PHP Notice: in file /includes/functions.php on line 4294: Cannot modify header information - headers already sent by (output started at /includes/functions.php:3501)
[phpBB Debug] PHP Notice: in file /includes/functions.php on line 4296: Cannot modify header information - headers already sent by (output started at /includes/functions.php:3501)
[phpBB Debug] PHP Notice: in file /includes/functions.php on line 4297: Cannot modify header information - headers already sent by (output started at /includes/functions.php:3501)
[phpBB Debug] PHP Notice: in file /includes/functions.php on line 4298: Cannot modify header information - headers already sent by (output started at /includes/functions.php:3501)
Armour Workshop • View topic - SdKfz.221 ~ Bronco

SdKfz.221 ~ Bronco

Re: SdKfz.221 ~ Bronco

Postby Jamie Tainton » Wed Dec 22, 2010 11:38 pm

So I've made some progress n this little guy, added the decals and then resprayed the area around those to help make them look less as though they are sitting on top of the surfaces. I used Mr.Mar? to set the decals, the one on the rear radiator the only one that gave me any trouble, with it being forced into co-operating in the end. wallbash
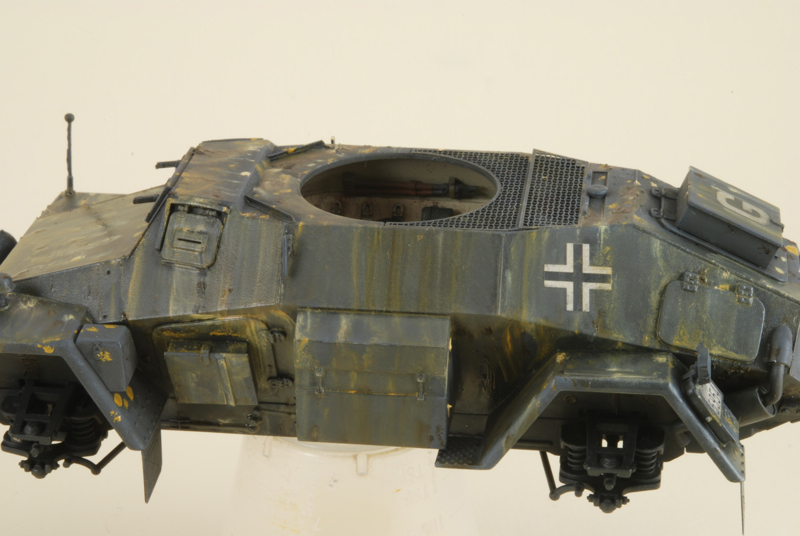
I then did a very dark wash with paint thinner and artist oil paints, black and raw umber. This was allowed to dry overnight and then I used Q-tips with a little paint thiner to remove the excess from the flat surfaces and high points, aiming to leave the dark around the details.
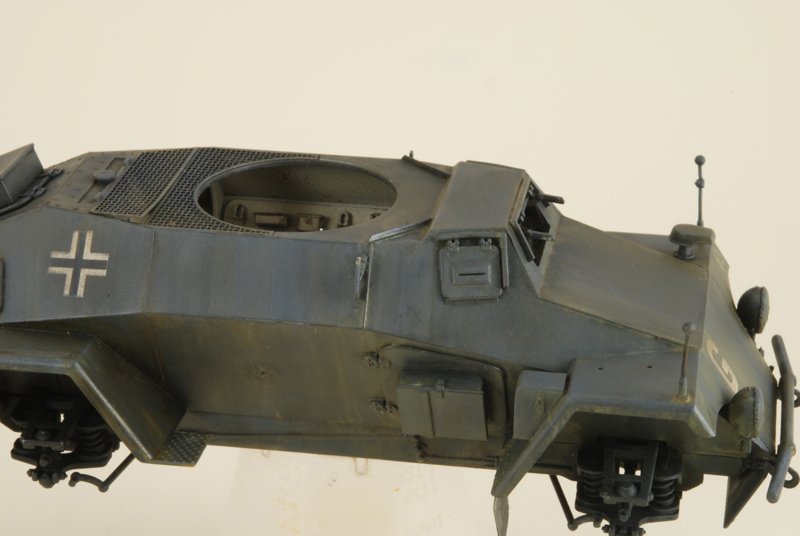
With that allowed to gas off and dry for a day I then did a flat clear coat (Humbrol) over which I decided to do a little dry brushing, not the usual sequence, to give the filters which were to follow something to have shine through, plus some of the paint was unfortunately removed from some of the high points during the removal of the oil wash.

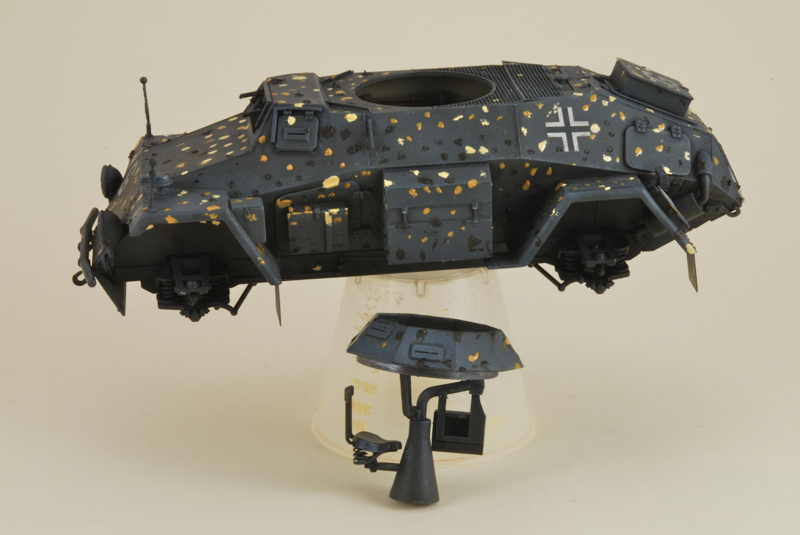
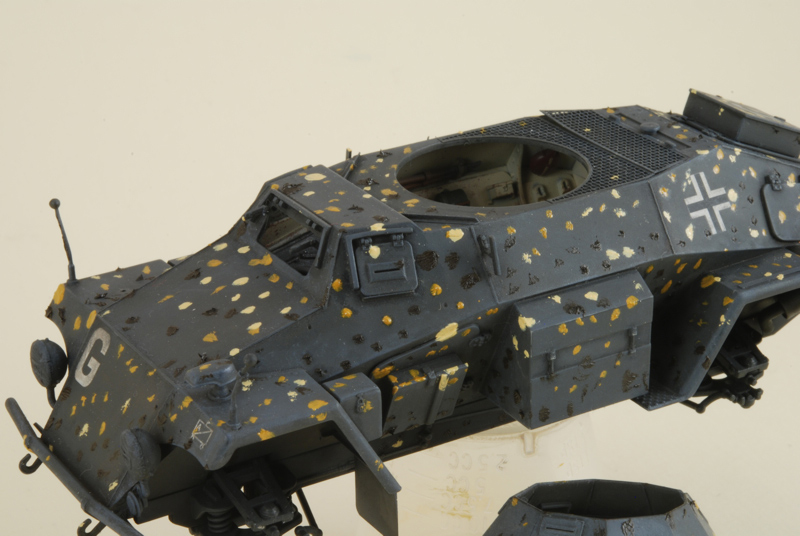
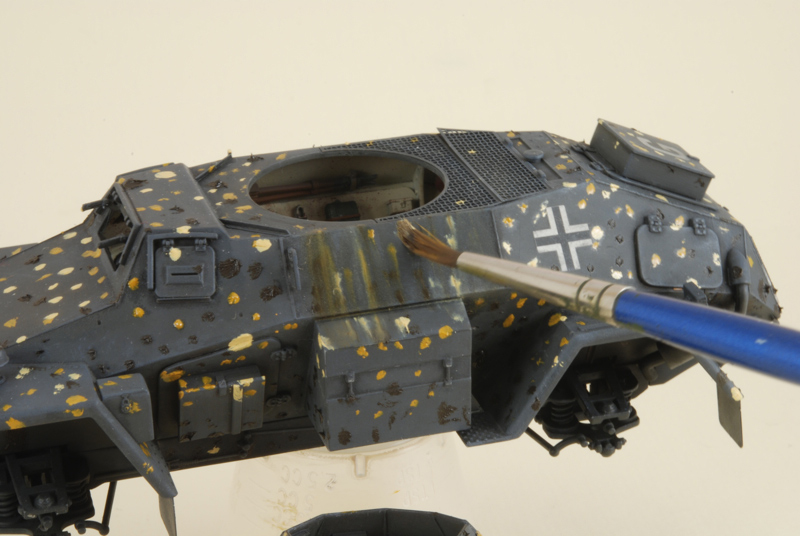
Then I will do around 3 "filters" followed by the "oil dot" method to help break up the surface and give the grey some more flavour, and help tie everything together. Then I suppose I'll give a layer of dust and then maybe a few "chips". Not chips in the paint per sae but maybe marks in the dust. painter
Image

Image

Image

Image

Image
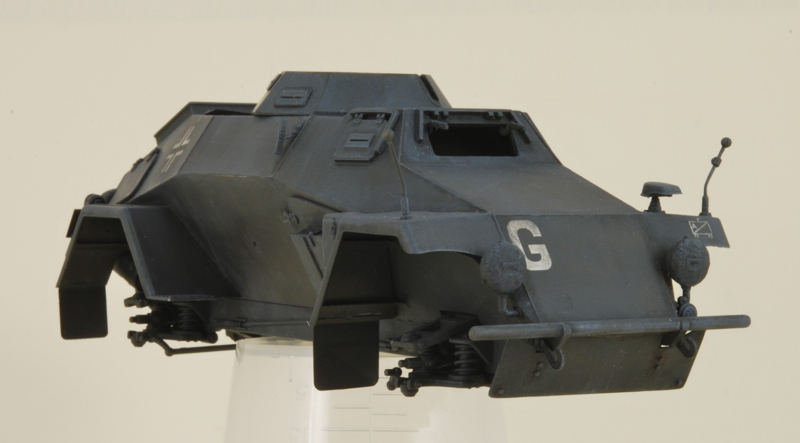
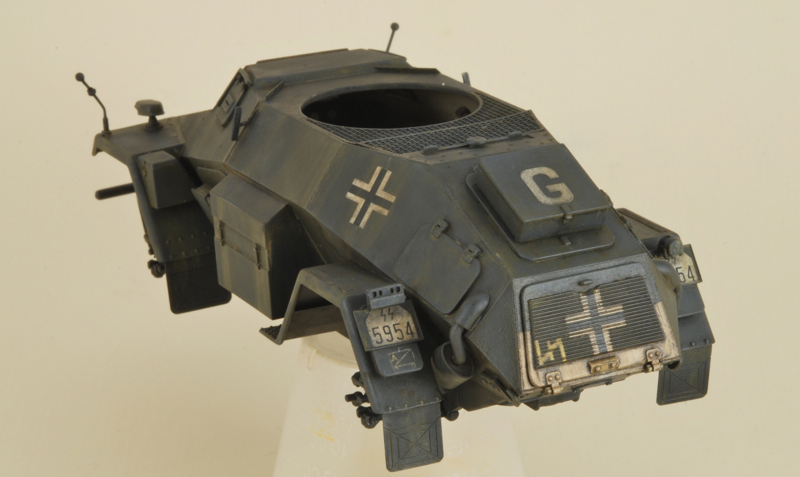
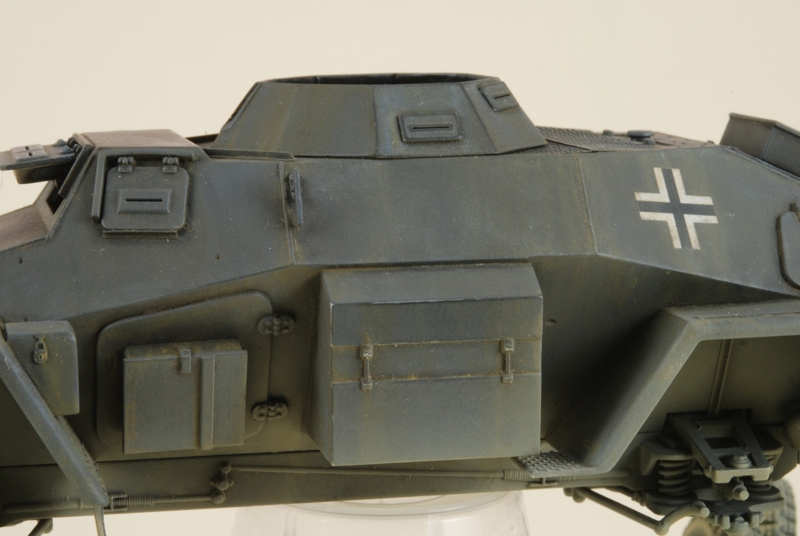
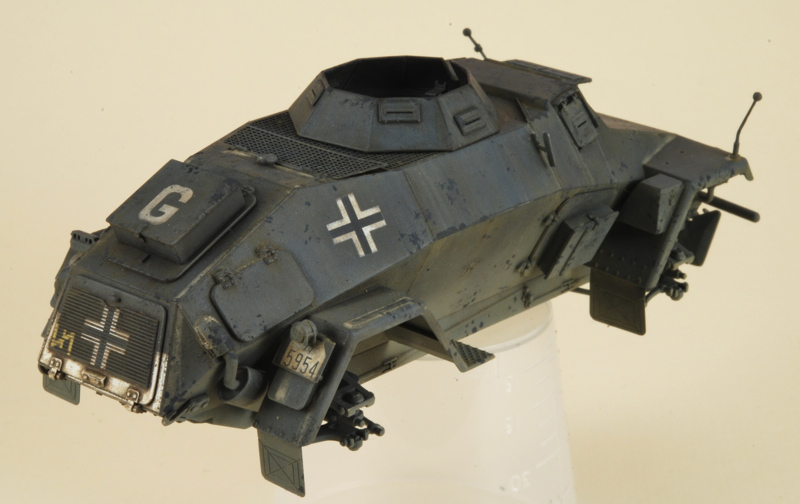
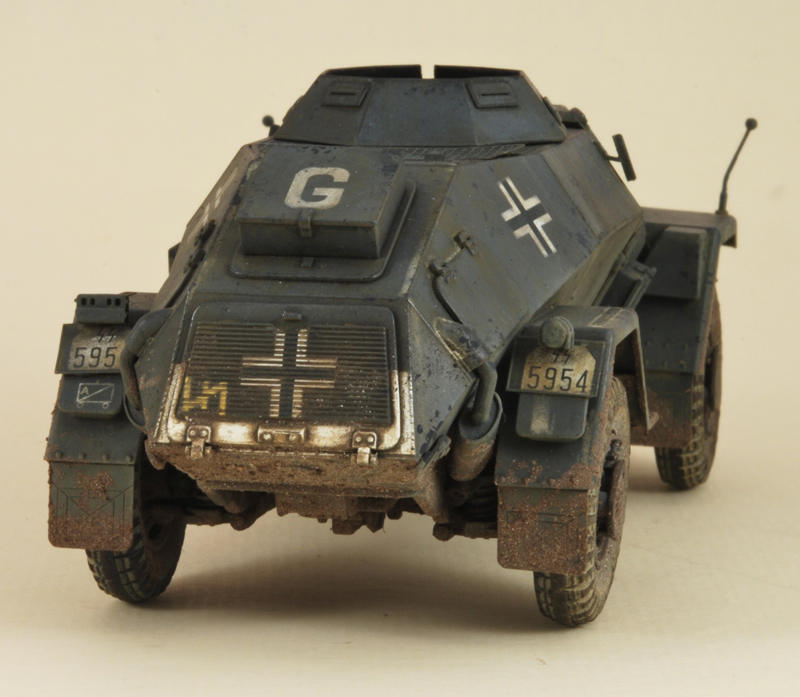
After I did the flat I actually used some very thinned down grey to try and portray the decals to be a little faded rather than leaving them hot white as they stood.
Image

Image

Image

Image
"Don't believe everything you think"
User avatar
Jamie Tainton
Site Admin
 
Posts: 2094
Joined: Wed Aug 19, 2009 1:01 pm
Location: Vancover BC Canada

Re: SdKfz.221 ~ Bronco

Postby Dan Reed » Thu Dec 23, 2010 9:11 am

Good call on toning down the white markings-all that white takes away a bit from the dark camo I think?
Also good call on keeping this almost chip free-these were nearly brand new vehicles and one would think in great shape.
Dust chipping is the new fad!!
My 2 cents.
Dan
Dan Reed
 
Posts: 271
Joined: Sun Dec 20, 2009 10:54 pm
Location: Buffalo, MN

Re: SdKfz.221 ~ Bronco

Postby Tim Coulson » Thu Dec 23, 2010 12:31 pm

Looks very nice Jamie.thumb6

The faded decals look great.

Tim
Tim Coulson
 
Posts: 428
Joined: Sun Feb 14, 2010 6:02 am
Location: Denmark

Re: SdKfz.221 ~ Bronco

Postby Jamie Tainton » Thu Dec 23, 2010 8:17 pm

"Don't believe everything you think"
User avatar
Jamie Tainton
Site Admin
 
Posts: 2094
Joined: Wed Aug 19, 2009 1:01 pm
Location: Vancover BC Canada

Re: SdKfz.221 ~ Bronco

Postby Jamie Tainton » Wed Dec 29, 2010 8:40 am

So some more progress, with a bitof a detour. I decided to do some dry-brushing prior to the filters.
Image

Image

Image

Image

I think the next thing was to seal that with a Humbrol flat coat #49 after a few days to let it all dry and cure.
On top of this the next technique called oil dot fading, was applied. I have not done this all that much so I think I may have overdone the amount, it did take a fair amount of work to get it where I like it, next time I'll use much less and perhaps not so much yellow ochre as it gave an undesired greenish tinge.
Image

Image

Image

Image

Image

Image

Image

Image

Image
"Don't believe everything you think"
User avatar
Jamie Tainton
Site Admin
 
Posts: 2094
Joined: Wed Aug 19, 2009 1:01 pm
Location: Vancover BC Canada

Re: SdKfz.221 ~ Bronco

Postby Jamie Tainton » Wed Dec 29, 2010 10:37 am

So more news with this update where I have added some Tamiya buff which has been thinned a whole bunch! First using this highly highly diluted mix in my airbrush I gave an overall delicate and very thin coat to the whole kit prior to an attempt to do some rain marks with the same mixture.
Image

Image

So now you can see I am air brushing a road dust coat to the lower aspects of the vehicle.
Image

Image

Next finally the wheels get some attention
Image

Image

So here, before I do the buff rain marks.
Image

and after with some "chips" added with a natural sponge and some Tamiya grey and black in the dust layer. Both are a little overdone and in the end I have taken this back a fair amount. I was not happy with this technique as I find the acrylic to unforgiving and literal in its application. I will try doing more of this but with oil paint instead.
Image

Image

Image

And finally!, because the way that Bronco has engineered the wheel attachment I have not been able to look at this build with the wheels in place, the hardest part of any build for me is waiting till all the steps are done one at a time. In this case all the mud and dirt needs to get added to the wheels and wheel wells before I can install the wheels.
Image

Image

Image

Image

Image

Image
"Don't believe everything you think"
User avatar
Jamie Tainton
Site Admin
 
Posts: 2094
Joined: Wed Aug 19, 2009 1:01 pm
Location: Vancover BC Canada

Re: SdKfz.221 ~ Bronco

Postby Dan Reed » Wed Dec 29, 2010 7:29 pm

James,
I like the way this looks and all the different ways of getting "the look" is very intresting!
Put this on a muddy base and it will look the bee's knees!
Dan
Dan Reed
 
Posts: 271
Joined: Sun Dec 20, 2009 10:54 pm
Location: Buffalo, MN

Re: SdKfz.221 ~ Bronco

Postby Jamie Tainton » Sat Jan 01, 2011 6:07 pm

"Don't believe everything you think"
User avatar
Jamie Tainton
Site Admin
 
Posts: 2094
Joined: Wed Aug 19, 2009 1:01 pm
Location: Vancover BC Canada

Re: SdKfz.221 ~ Bronco

Postby Jamie Tainton » Sat Jan 01, 2011 6:24 pm

here you can see I have used the kit provided fire extinguisher on the right front fender, detailed with an Archer sticker.
Image

Before pigments
Image

After pigments
Image

Image

Image

Image

Image

Image
"Don't believe everything you think"
User avatar
Jamie Tainton
Site Admin
 
Posts: 2094
Joined: Wed Aug 19, 2009 1:01 pm
Location: Vancover BC Canada

Re: SdKfz.221 ~ Bronco

Postby Jamie Tainton » Sat Jan 01, 2011 6:26 pm

here you can see I have used the kit provided fire extinguisher on the right front fender, detailed with an Archer sticker.
Image

Before pigments
Image

After pigments
Image

Image

Image

Image

Image

Image

Image
"Don't believe everything you think"
User avatar
Jamie Tainton
Site Admin
 
Posts: 2094
Joined: Wed Aug 19, 2009 1:01 pm
Location: Vancover BC Canada

PreviousNext

Return to Armoured cars and wheeled armoured vehicles

Who is online

Users browsing this forum: No registered users and 1 guest

cron