[phpBB Debug] PHP Notice: in file /includes/bbcode.php on line 483: preg_replace(): The /e modifier is no longer supported, use preg_replace_callback instead
[phpBB Debug] PHP Notice: in file /includes/bbcode.php on line 483: preg_replace(): The /e modifier is no longer supported, use preg_replace_callback instead
[phpBB Debug] PHP Notice: in file /includes/bbcode.php on line 483: preg_replace(): The /e modifier is no longer supported, use preg_replace_callback instead
[phpBB Debug] PHP Notice: in file /includes/bbcode.php on line 483: preg_replace(): The /e modifier is no longer supported, use preg_replace_callback instead
[phpBB Debug] PHP Notice: in file /includes/bbcode.php on line 483: preg_replace(): The /e modifier is no longer supported, use preg_replace_callback instead
[phpBB Debug] PHP Notice: in file /includes/bbcode.php on line 483: preg_replace(): The /e modifier is no longer supported, use preg_replace_callback instead
[phpBB Debug] PHP Notice: in file /includes/bbcode.php on line 483: preg_replace(): The /e modifier is no longer supported, use preg_replace_callback instead
[phpBB Debug] PHP Notice: in file /includes/bbcode.php on line 483: preg_replace(): The /e modifier is no longer supported, use preg_replace_callback instead
[phpBB Debug] PHP Notice: in file /includes/bbcode.php on line 483: preg_replace(): The /e modifier is no longer supported, use preg_replace_callback instead
[phpBB Debug] PHP Notice: in file /includes/bbcode.php on line 483: preg_replace(): The /e modifier is no longer supported, use preg_replace_callback instead
[phpBB Debug] PHP Notice: in file /includes/bbcode.php on line 483: preg_replace(): The /e modifier is no longer supported, use preg_replace_callback instead
[phpBB Debug] PHP Notice: in file /includes/bbcode.php on line 483: preg_replace(): The /e modifier is no longer supported, use preg_replace_callback instead
[phpBB Debug] PHP Notice: in file /includes/bbcode.php on line 483: preg_replace(): The /e modifier is no longer supported, use preg_replace_callback instead
[phpBB Debug] PHP Notice: in file /includes/bbcode.php on line 483: preg_replace(): The /e modifier is no longer supported, use preg_replace_callback instead
[phpBB Debug] PHP Notice: in file /includes/bbcode.php on line 483: preg_replace(): The /e modifier is no longer supported, use preg_replace_callback instead
[phpBB Debug] PHP Notice: in file /includes/bbcode.php on line 483: preg_replace(): The /e modifier is no longer supported, use preg_replace_callback instead
[phpBB Debug] PHP Notice: in file /includes/bbcode.php on line 483: preg_replace(): The /e modifier is no longer supported, use preg_replace_callback instead
[phpBB Debug] PHP Notice: in file /includes/bbcode.php on line 483: preg_replace(): The /e modifier is no longer supported, use preg_replace_callback instead
[phpBB Debug] PHP Notice: in file /includes/bbcode.php on line 483: preg_replace(): The /e modifier is no longer supported, use preg_replace_callback instead
[phpBB Debug] PHP Notice: in file /includes/bbcode.php on line 483: preg_replace(): The /e modifier is no longer supported, use preg_replace_callback instead
[phpBB Debug] PHP Notice: in file /includes/bbcode.php on line 483: preg_replace(): The /e modifier is no longer supported, use preg_replace_callback instead
[phpBB Debug] PHP Notice: in file /includes/bbcode.php on line 483: preg_replace(): The /e modifier is no longer supported, use preg_replace_callback instead
[phpBB Debug] PHP Notice: in file /includes/bbcode.php on line 483: preg_replace(): The /e modifier is no longer supported, use preg_replace_callback instead
[phpBB Debug] PHP Notice: in file /includes/bbcode.php on line 483: preg_replace(): The /e modifier is no longer supported, use preg_replace_callback instead
[phpBB Debug] PHP Notice: in file /includes/bbcode.php on line 483: preg_replace(): The /e modifier is no longer supported, use preg_replace_callback instead
[phpBB Debug] PHP Notice: in file /includes/bbcode.php on line 483: preg_replace(): The /e modifier is no longer supported, use preg_replace_callback instead
[phpBB Debug] PHP Notice: in file /includes/bbcode.php on line 112: preg_replace(): The /e modifier is no longer supported, use preg_replace_callback instead
[phpBB Debug] PHP Notice: in file /includes/bbcode.php on line 112: preg_replace(): The /e modifier is no longer supported, use preg_replace_callback instead
[phpBB Debug] PHP Notice: in file /includes/bbcode.php on line 112: preg_replace(): The /e modifier is no longer supported, use preg_replace_callback instead
[phpBB Debug] PHP Notice: in file /includes/functions.php on line 4294: Cannot modify header information - headers already sent by (output started at /includes/functions.php:3501)
[phpBB Debug] PHP Notice: in file /includes/functions.php on line 4296: Cannot modify header information - headers already sent by (output started at /includes/functions.php:3501)
[phpBB Debug] PHP Notice: in file /includes/functions.php on line 4297: Cannot modify header information - headers already sent by (output started at /includes/functions.php:3501)
[phpBB Debug] PHP Notice: in file /includes/functions.php on line 4298: Cannot modify header information - headers already sent by (output started at /includes/functions.php:3501)
Armour Workshop • View topic - Dragon Pz.Kpfw. IV Ausf. E "Vorpanzer" Kit No. 6301

Dragon Pz.Kpfw. IV Ausf. E "Vorpanzer" Kit No. 6301

Dragon Pz.Kpfw. IV Ausf. E "Vorpanzer" Kit No. 6301

Postby Steve Sprague » Fri Jan 29, 2010 2:26 pm

Hey all, I thought I would post a build in progress I'm currently working on. If anyone here goes to Planet Armor, you may have seen this going already on the VBench, but I would also like to get the opinions of you guys here as you bunch seem to be really good at what you do. thumb2

http://www.planetarmor.com/forums/showt ... 699&page=1

Ive been working on this kit now for about 3 weeks or so and its progressing kind of slowly as Im taking my time to get everything just right (or as right as an 800lb gorilla with no fine motor skills can make it). I absolutely love this kit and the detail its offering is quite good. To add to it, I picked up an Eduard PE kit for the D variant and will be able to use a lot of those parts to help enhance this build. Ultimately, this will be just weathered a bit to be fieldworn, not caked in mud or rust or whatever. Years and years ago, I used to build armor and Im so glad to get back to this hobby. Its stress therapy for me ;woot: Anyway, thanks for taking the time to look and offering any comments and constructive criticism you may have.

Steve
Steve Sprague
 
Posts: 50
Joined: Mon Jan 11, 2010 3:22 am
Location: Converse, Texas USA

Re: Dragon Pz.Kpfw. IV Ausf. E "Vorpanzer" Kit No. 6301

Postby Steve Sprague » Sat Jan 30, 2010 10:35 pm

First off, I would like to say that this is my second kit after coming back to this fun little hobby after 25+ years being out of it. I work a pretty stressful job and Ive found that this hobby eliminates 99% of that. When I bought this kit, I had no idea what I was getting into, thinking it was going to be like the old skool Tamiya kits from my youth. Man, have things changed! Ive subscribed to a number of forums and have been reading and gathering information. Ive got a pretty good work area set up and have all the necessary tools, paints and other things needed to get this project finished and hopefully looking good. I do need to find an affordable PE bending tool...I made a scratchbuilt PE bender, but I want the real thing. Anyway, I thought it would be fun to get a vBench going for this project in hopes that your guidance and constructive criticism aid me in making this a great addition to my finished works. Anyway, onto the kit;

Image

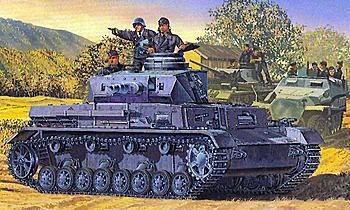
I selected the Pz.Kpfw. IV Ausf. E "Vorpanzer" when it first came out as Ive always loved the PzIV family of armor and they were the backbone of the Panzer forces and just overall good tanks from my understanding. So far, Ive spent about 20 hours on it and have only just now almost finished step 1 in the instructions . You look at the parts and think, ok, this isnt so bad, but my eyes and fingers dont work as well as they did when I was a teenager and Im almost positive the parts got smaller! I have to say though that I absolutely love the detail that seems to be in almost every manufacturers kit and my mind is already working on what I want to do next which will be a diorama I had once done when I was younger and I want to do it over. Sadly, I have none of my models from when I was a kid.

Ok, here we go! Step 1...

Image
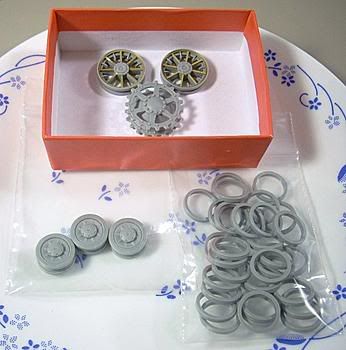
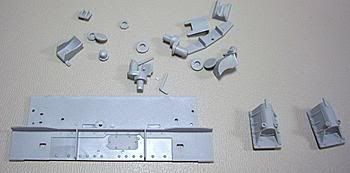
Tires, spare wheels and idler(?) ready to go. Im of course cleaning all parts of flash and ensuring a good fit.

Image
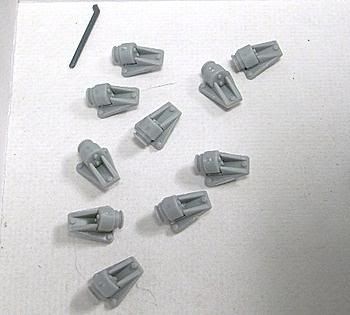
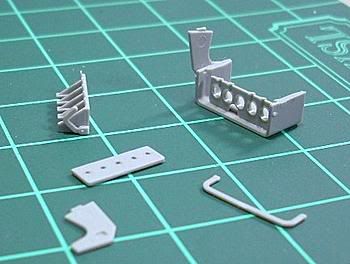
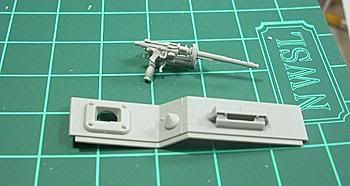
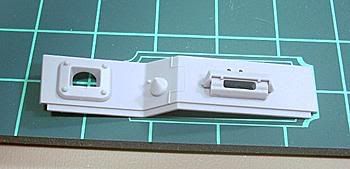
Unsure what these parts are, but cleaning them was time consuming.

Image
Finally finished the suspension group. 64 parts total for this step. A whole lot of tiny detail cleaning and Im really surprised that I havent lost a part yet into the carpet.

Image
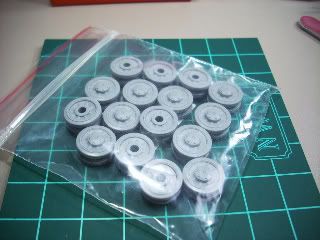
Wheels done. The fit was excellent here and I ended up not gluing any of the tires to the wheels. Apparently the seam through the center of the tires is intended according to the box description of the parts.

Image
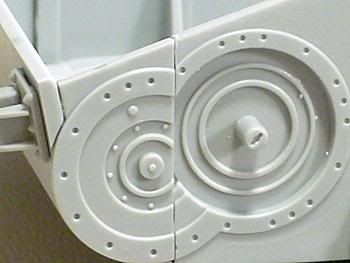
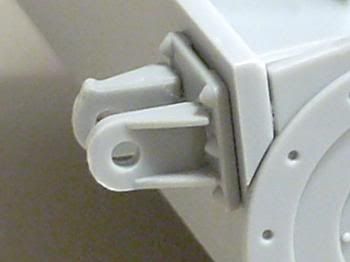
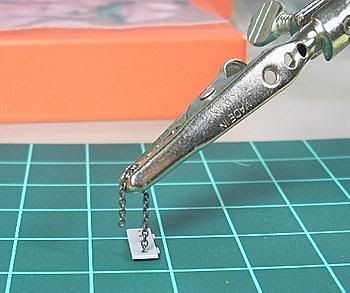
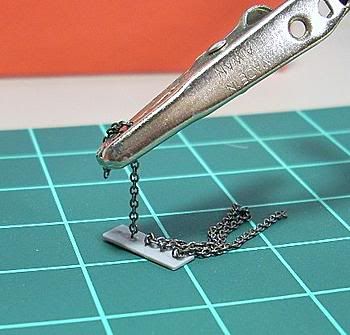
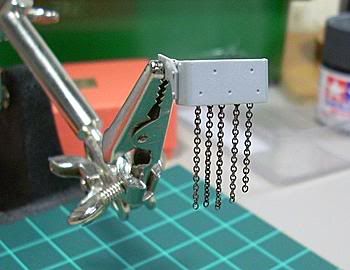
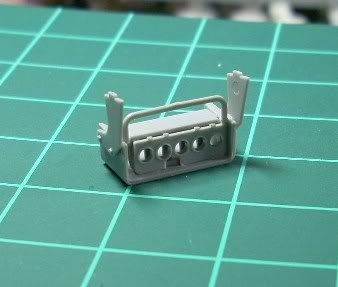
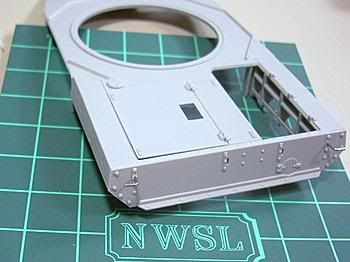
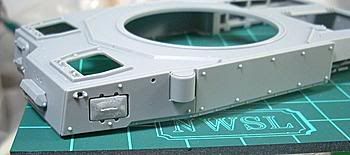
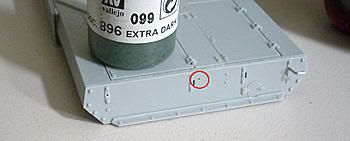
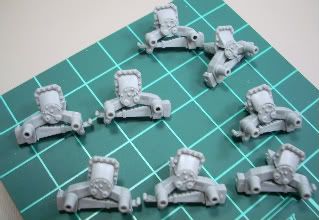
These are all the parts for the rear of the Pz. except for the PE as those are sitting in a pill bottle. I am a little bit confused by a couple of parts here... D42 is showing that a PE bracket (MA60/61) can be attached to it, but I dont see where this is supposed to happen. Also, when I completed the sub-assembly of the rear idlers, part D31 apparently just sits in the hole of D34/35? All this took me several evenings to clean and prep. Im really impressed with the level of detail in this kit already and Im a bit intimidated by the skill its going to require.

Image
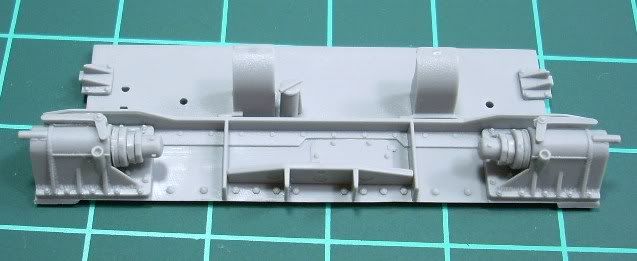
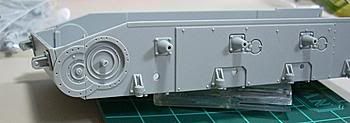
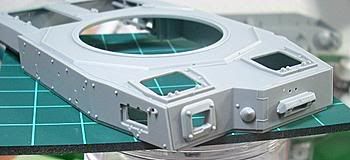
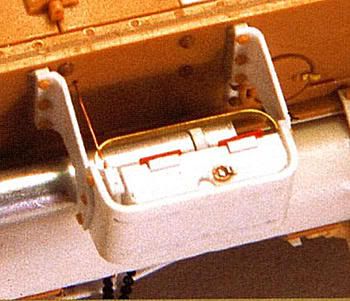
99% finished. Still need to add the PE and figure out if Im to glue those parts of the idlers into place or leave them loose for track fitting.

Image
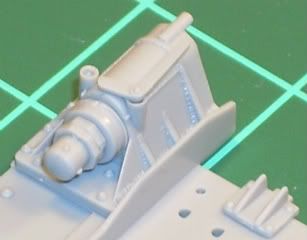
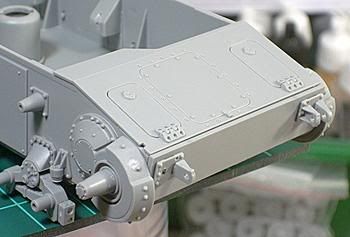
I offset the nut on the gear group to be a bit more realistic.


Steve
Steve Sprague
 
Posts: 50
Joined: Mon Jan 11, 2010 3:22 am
Location: Converse, Texas USA

Re: Dragon Pz.Kpfw. IV Ausf. E "Vorpanzer" Kit No. 6301

Postby Steve Sprague » Sat Jan 30, 2010 10:43 pm

Just a quick update...been busy in real life. (Originally posted 1-13-10)

Image
Attached the front lower hull, fuel filler caps and the little piston looking thingies.

Image
Detail on the front. Not too bad of a fit.

Image
Also attached the tow points.

Image
This is my build buddy...he gets kind of excited when Im working as he is still a kitten...a great big, hulking 16lb. kitten (9mos old). He is a bluepoint Siamese Ragdoll mix named Memory.

The smoke candle dispenser is starting to take shape. I have pre-marked the lid for the chain attachments. Im going to have to fashion some half-links to the lid somehow. Im going to try to use half links of the chain Im going to use for the part but they are awful tiny!

Image
Steve Sprague
 
Posts: 50
Joined: Mon Jan 11, 2010 3:22 am
Location: Converse, Texas USA

Re: Dragon Pz.Kpfw. IV Ausf. E "Vorpanzer" Kit No. 6301

Postby Steve Sprague » Sun Jan 31, 2010 7:29 pm

Ok, time for a fresh update... (Originally posted 1-17-2010)

I solved my problem with how I was going to fix the chains to the smoke candle box...just good ol superglue. I used the extra pair of hands to suspend the chain directly over the lid where I had previously marked the center point of where the chain should be mounted. I placed a small drop of CA on the lid and then maneuvered it into position and then lowered the chain onto it until only one link was touching.

Image


Image
Moving along...

Image
Almost done....

Image
Finally done... Im pleased with the results. Later, Ill trim up the chain to a more realistic length.

Image
Finished putting the smoke candle box together....

And now we are moving onto Step 5 and 6 with the drive wheels finished:

Image
Steve Sprague
 
Posts: 50
Joined: Mon Jan 11, 2010 3:22 am
Location: Converse, Texas USA

Re: Dragon Pz.Kpfw. IV Ausf. E "Vorpanzer" Kit No. 6301

Postby Steve Sprague » Sun Jan 31, 2010 7:44 pm

Starting work on the upper structure, hull MG (ton of detail in that).

Image

There are some clear parts for the viewing ports in the next step and I managed to snip off one of the required pieces and then proceed to clean up the area nicely. Its on the vision block itself. Ill just have to wing it and fit it as best as possible. Doh! I wonder why Dragon just didnt cast the parts in regular grey plastic and JUST the blocks in clear?

Image

Im attaching the extra armor that makes this kit the "vorpanzer" version. I had to alter the default armor to allow for the other applied armor to fit. Drilling out holes and shaving off details that will interfere with fit.

Image

Both sides were sandwiched together and are being allowed to set up.

Image

Im also currently working on getting the fit right for the front sloping armor as well as the doors for the rear deck. The square door on the rear is having some fit issues and Im having to shave it down some. Not sure what happened there.

Image

The front armor is complete and the visor went together just fine and is fully articulated. Anyone know what that boob shaped feature is for?

More to come....
Steve Sprague
 
Posts: 50
Joined: Mon Jan 11, 2010 3:22 am
Location: Converse, Texas USA

Re: Dragon Pz.Kpfw. IV Ausf. E "Vorpanzer" Kit No. 6301

Postby Steve Sprague » Sun Jan 31, 2010 7:51 pm

Time for another update... I felt 'sick' (cough, cough) so I stayed home from work and tried some self inflicted therapy .

Image
The ugly visor port was some ambition gone wrong...I tried to open the vision slit but it turned out rather poorly so I filled it with putty and will rescribe the slit.

Image
I began by affixing the hull structures to the upper deck. The fit wasnt too bad but Ive got some very small gaps that will probably need some surfacer to fill.

Image
The front sloping armor fit like a dream and the transmission access doors were a perfect fit as well.

Image
As I mentioned in another update, I was having a fit problem with the larger door on the rear deck. I pretty much got that taken care of and took a page from Coops and cemented the parts from below so that there was no chance of glue being visible from outside

The red circle is indicating a small hole I drilled for the smoke candle box control rod. As seen in this photo Im using as a guide:

Image

I still have a few fiddly bits to re-attach due to handling mishaps (how the heck do you prevent these from happening as you build?) but everything is starting to take shape and look like a PZIV.

More to come....
Steve Sprague
 
Posts: 50
Joined: Mon Jan 11, 2010 3:22 am
Location: Converse, Texas USA

Re: Dragon Pz.Kpfw. IV Ausf. E "Vorpanzer" Kit No. 6301

Postby Jamie Tainton » Mon Feb 01, 2010 5:01 pm

Looks good Steve. Only thing I kinda did a double take on was the size of the chains on your smoke grenade dispenser- a little big but...passable ;woot:
"Don't believe everything you think"
User avatar
Jamie Tainton
Site Admin
 
Posts: 2094
Joined: Wed Aug 19, 2009 1:01 pm
Location: Vancover BC Canada

Re: Dragon Pz.Kpfw. IV Ausf. E "Vorpanzer" Kit No. 6301

Postby Steve Sprague » Mon Feb 01, 2010 8:29 pm

Steve Sprague
 
Posts: 50
Joined: Mon Jan 11, 2010 3:22 am
Location: Converse, Texas USA

Re: Dragon Pz.Kpfw. IV Ausf. E "Vorpanzer" Kit No. 6301

Postby Jamie Tainton » Tue Feb 02, 2010 1:15 pm

"Don't believe everything you think"
User avatar
Jamie Tainton
Site Admin
 
Posts: 2094
Joined: Wed Aug 19, 2009 1:01 pm
Location: Vancover BC Canada

Re: Dragon Pz.Kpfw. IV Ausf. E "Vorpanzer" Kit No. 6301

Postby Steve Sprague » Tue Feb 02, 2010 6:12 pm

Steve Sprague
 
Posts: 50
Joined: Mon Jan 11, 2010 3:22 am
Location: Converse, Texas USA

Next

Return to Panzerkampfwagen IV and variants

Who is online

Users browsing this forum: No registered users and 2 guests

cron